Using a 16X2 I2C LCD display with an Arduino allows you to create various text styles and effects to enhance the user interface. This guide provides detailed examples for displaying simple text, blinking text, and scrolling text on the LCD.
Prerequisites
- Library Installation:
- Ensure you have the
LiquidCrystal_I2Clibrary installed. You can install it from the Arduino Library Manager (Sketch > Include Library > Manage Libraries… and search for “LiquidCrystal_I2C”).
- Wiring Connections:
- Connect the SDA pin of the LCD to the SDA pin on the Arduino (A4 on Uno).
- Connect the SCL pin of the LCD to the SCL pin on the Arduino (A5 on Uno).
- Connect the VCC pin of the LCD to the 5V pin on the Arduino.
- Connect the GND pin of the LCD to the GND pin on the Arduino.
Example 1: Simple Text Display
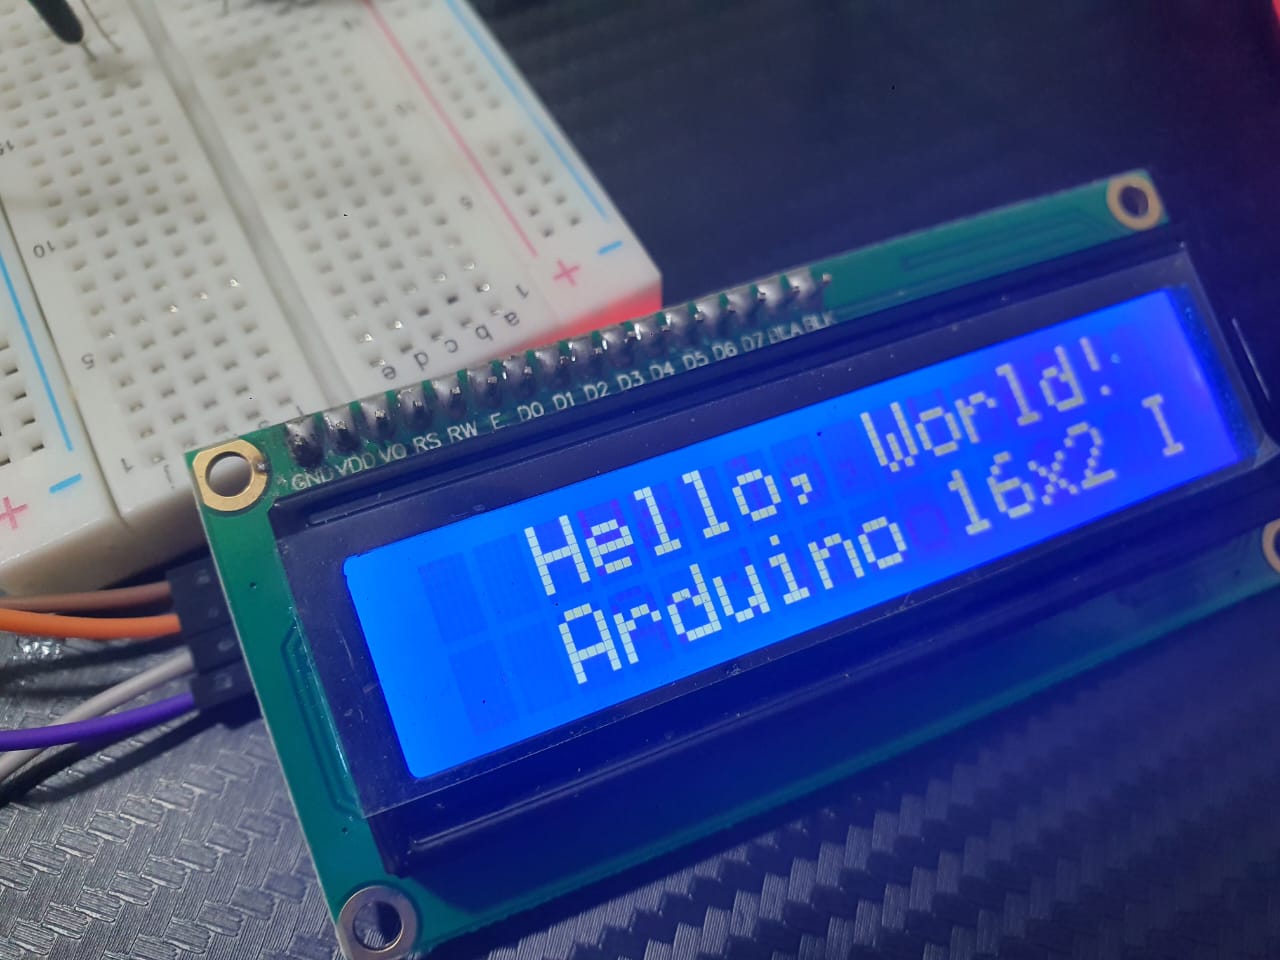
This example demonstrates how to display static text on the 16X2 I2C LCD.
#include <Wire.h>
#include <LiquidCrystal_I2C.h>

// Initialize the library with the I2C address and the size of the LCD
LiquidCrystal_I2C lcd(0x27, 16, 2);

void setup() {
  // Initialize the LCD and turn on the backlight
  lcd.init();
  lcd.backlight();
}

void loop() {
  // Display simple messages on different lines
  lcd.setCursor(0, 0);
  lcd.print("Hello, World!");
  lcd.setCursor(0, 1);
  lcd.print("Arduino 16x2 I2C");
  lcd.setCursor(0, 2);
  delay (5000);
  lcd.clear(); // Turn off the display
  // Display new messages on different lines
  lcd.setCursor(0, 0);
  lcd.print("Text Display");
  lcd.setCursor(0, 1);
  lcd.print("End");
  lcd.setCursor(0, 2);
  delay (5000);
}
Example 2: Blinking Text
This example shows how to make text blink on the LCD.
#include <Wire.h>
#include <LiquidCrystal_I2C.h>

// Initialize the library with the I2C address and the size of the LCD
LiquidCrystal_I2C lcd(0x27, 16, 2);

void setup() {
  // Initialize the LCD and turn on the backlight
  lcd.init();
  lcd.backlight();
}

void loop() {
  // Display simple messages on different lines
  lcd.setCursor(0, 0);
  lcd.print("Hello, World!");
  lcd.setCursor(0, 1);
  lcd.print("Arduino 16x2 I2C");
  lcd.setCursor(0, 2);
  // Blink the text by turning the display on and off
  lcd.noDisplay();  // Turn off the display
  delay(500);       // Wait for 500 milliseconds
  lcd.display();    // Turn on the display
  delay(500);       // Wait for 500 milliseconds
  lcd.clear(); // Turn off the display
  // Display new messages on different lines
  lcd.setCursor(0, 0);
  lcd.print("Text Display");
  lcd.setCursor(0, 1);
  lcd.print("End");
  lcd.setCursor(0, 2);
  // Blink the text by turning the display on and off
  lcd.noDisplay();  // Turn off the display
  delay(500);       // Wait for 500 milliseconds
  lcd.display();    // Turn on the display
  delay(500);       // Wait for 500 milliseconds
}
Example 3: Scrolling Text
This example demonstrates how to create a scrolling text effect on the LCD.
#include <Wire.h>
#include <LiquidCrystal_I2C.h>

// Initialize the library with the I2C address and the size of the LCD
LiquidCrystal_I2C lcd(0x27, 16, 2);

void setup() {
  // Initialize the LCD and turn on the backlight
  lcd.init();
  lcd.backlight();
}

void loop() {
  // Display simple messages on different lines
  lcd.setCursor(0, 0);
  lcd.print("Hello, World!");
  lcd.setCursor(0, 1);
  lcd.print("Arduino 16x2 I2C");
  lcd.setCursor(0, 2);
  // Scroll the text to the left
  for (int i = 0; i < 20; i++) {
    lcd.scrollDisplayLeft();
    delay(300);
  }
  lcd.clear();
  // Display new messages on different lines
  lcd.setCursor(0, 0);
  lcd.print("Text Display");
  lcd.setCursor(0, 1);
  lcd.print("End");
  lcd.setCursor(0, 2);
  // Scroll the text to the right
  for (int i = 0; i < 20; i++) {
  lcd.scrollDisplayRight();
  delay(300);
  }
}
Example 4: Combining Effects
This example combines simple text display, blinking text, and scrolling text in a single program.
#include <Wire.h>
#include <LiquidCrystal_I2C.h>

// Initialize the library with the I2C address and the size of the LCD
LiquidCrystal_I2C lcd(0x27, 16, 2);

void setup() {
  // Initialize the LCD and turn on the backlight
  lcd.init();
  lcd.backlight();
}

void loop() {
  // Display simple messages on different lines
  lcd.setCursor(0, 0);
  lcd.print("Hello, World!");
  lcd.setCursor(0, 1);
  lcd.print("Arduino 16x2 I2C");
  lcd.setCursor(0, 2);
  // Blink the text by turning the display on and off
  lcd.noDisplay();  // Turn off the display
  delay(500);       // Wait for 500 milliseconds
  lcd.display();    // Turn on the display
  delay(500);       // Wait for 500 milliseconds
  lcd.noDisplay();  // Turn off the display
  delay(500);       // Wait for 500 milliseconds
  lcd.display();    // Turn on the display
  delay(500);       // Wait for 500 milliseconds
  // Scroll the text to the left
  for (int i = 0; i < 20; i++) {
    lcd.scrollDisplayLeft();
    delay(300);
  }
  lcd.clear();
  // Display new messages on different lines
  lcd.setCursor(0, 0);
  lcd.print("Text Display");
  lcd.setCursor(0, 1);
  lcd.print("End");
  lcd.setCursor(0, 2);
  // Blink the text by turning the display on and off
  lcd.noDisplay();  // Turn off the display
  delay(500);       // Wait for 500 milliseconds
  lcd.display();    // Turn on the display
  delay(500);       // Wait for 500 milliseconds
  lcd.noDisplay();  // Turn off the display
  delay(500);       // Wait for 500 milliseconds
  lcd.display();    // Turn on the display
  delay(500);       // Wait for 500 milliseconds
  // Scroll the text to the right
  for (int i = 0; i < 20; i++) {
  lcd.scrollDisplayRight();
  delay(300);
  }
}
Detailed Explanation
A. Simple Text:
- Use
lcd.setCursor(col, row)to position the cursor. - Use
lcd.print("Your text")to display text at the cursor position.
B. Blinking Text:
- The
lcd.noDisplay()function turns off the display without clearing the text. - The
lcd.display()function turns the display back on. - Use
delay(ms)to control the blinking speed.
C. Scrolling Text:
- The
lcd.scrollDisplayLeft()function scrolls the entire display to the left. - Use
delay(ms)to control the scroll speed.
D. Combining Effects:
- Use
lcd.clear()to clear the display before displaying new text. - Combine simple, blinking, and scrolling text effects sequentially.
By using these examples, you can create various text styles and effects on a 20×4 I2C LCD display, enhancing the functionality and user interface of your Arduino projects.
Expertise on Engineering.
Robotic and microcontroller are like toys to me.
I love playing with them.