An Active Buzzer Tone Piezo is an essential electronic component designed to generate sound when powered. Here’s a detailed exploration of its components, functionality, and applications:
Components
- Active Buzzer:
- Active: This means the buzzer has an internal oscillating circuit, enabling it to produce sound automatically when voltage is applied, without the need for an external signal generator.
- Buzzer: A device that emits sound, typically used in alarms, notifications, and alerts.
2. Tone:
- Refers to the specific pitch or frequency of the sound that the buzzer produces. Active buzzers are designed to emit a consistent tone at a predetermined frequency when activated.
3. Piezo:
- Piezoelectric: Involves the use of piezoelectric materials that produce sound through mechanical vibrations when an electrical signal is applied. Piezo buzzers are known for their reliability, simplicity, and efficiency.
Functionality
An active piezo buzzer operates by combining a piezoelectric element with an internal oscillating circuit. When electrical power is supplied, the oscillating circuit causes the piezoelectric element to vibrate at a specific frequency, producing sound. The frequency of the oscillation determines the pitch of the sound emitted.
Pinout
Understanding the pinout of an Active Buzzer Tone Piezo is essential for proper integration into electronic circuits. Here’s a detailed explanation of the pinout and how to connect it:
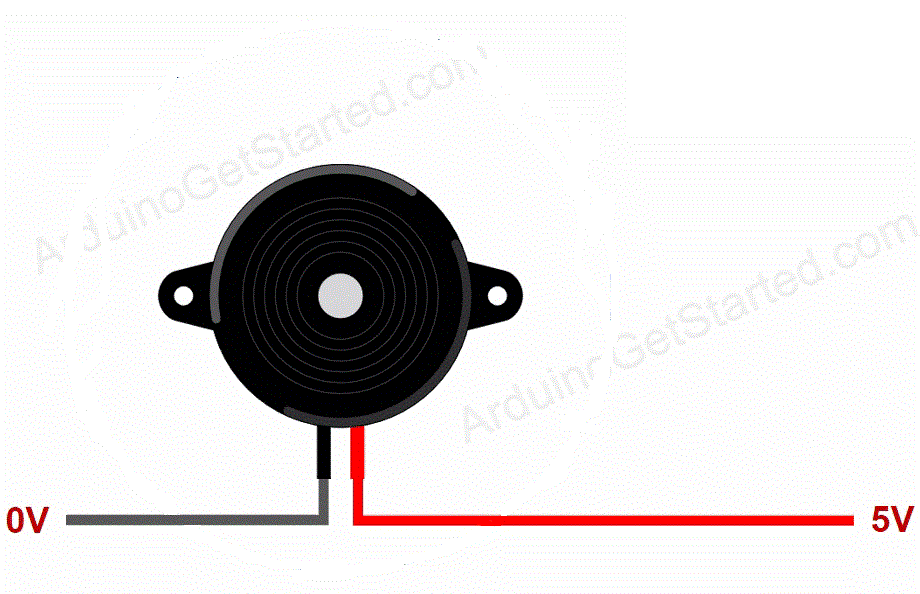
An active piezo buzzer typically has two pins:
- Positive Pin (+):
- This pin is connected to the positive voltage supply (Vcc).
- It is usually marked with a “+” sign or a longer lead if the leads are not of the same length.
- Supplying the rated voltage (e.g., 3V, 5V, or 12V) to this pin activates the buzzer.
- Negative Pin (-):
- This pin is connected to the ground (GND) of the circuit.
- It may be marked with a “-” sign or be the shorter lead.
- Completing the circuit with this pin ensures proper operation and sound generation.
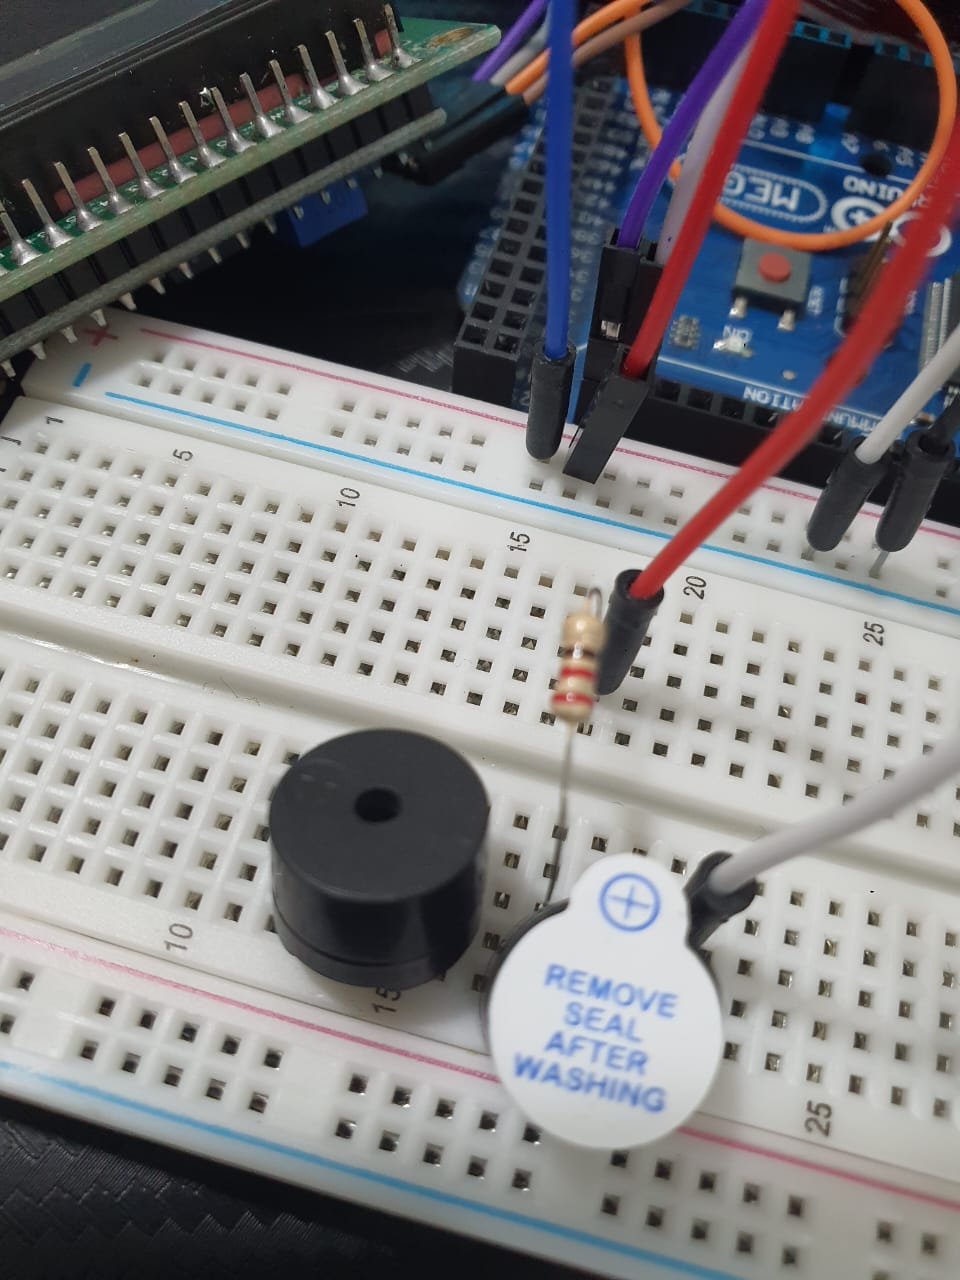
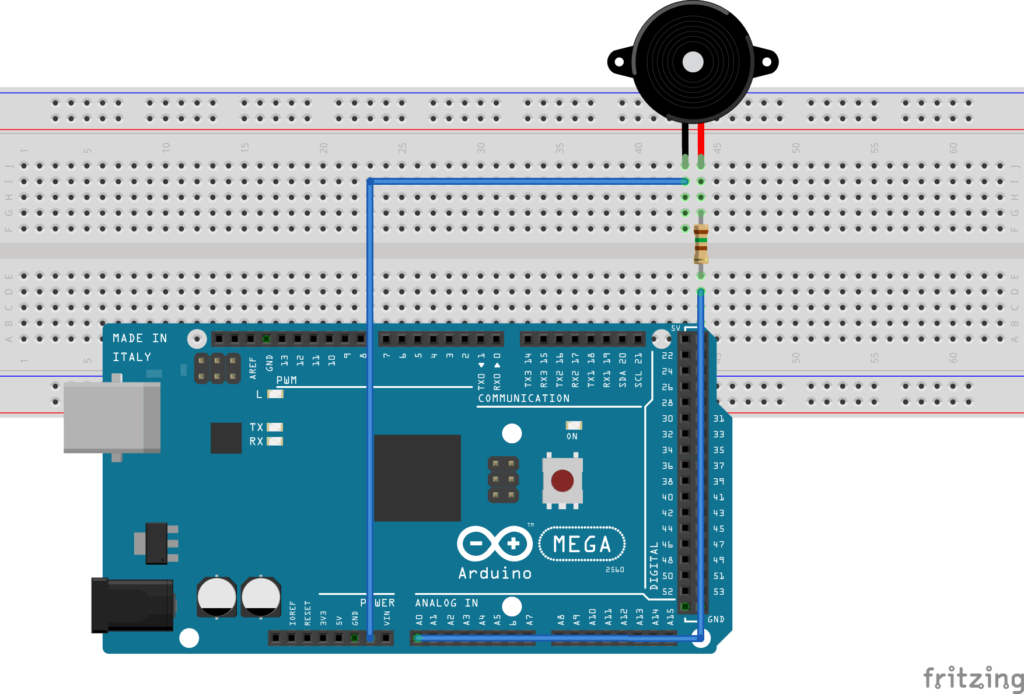
Connection Example
Here’s a simple example to illustrate the connection of an active piezo buzzer in a circuit:
Components Needed:
- Active Buzzer Tone Piezo (e.g., rated for 5V)
- Power supply (e.g., 5V battery or DC power source)
- Resistor 150 ohm
- Connecting wires
Steps:
- Identify the positive (+) and negative (-) pins on the buzzer.
- Connect the positive pin (+) of the buzzer to the positive terminal of the power supply.
- Connect the negative pin (-) of the buzzer to the ground (GND) terminal of the power supply.
Schematic Diagram:
Active Buzzer Tone Piezo Code Example:
Here’s a simple example to make the buzzer produce a tone when powered.
// Define the pin connected to the buzzer
const int buzzerPin = A0;

void setup() {
  // Initialize the digital pin as an output.
  pinMode(buzzerPin, OUTPUT);
}

void loop() {
  // Turn the buzzer on
  digitalWrite(buzzerPin, HIGH);
  delay(1000); // Wait for 1 second

  // Turn the buzzer off
  digitalWrite(buzzerPin, LOW);
  delay(1000); // Wait for 1 second
}
Playing a Melody Example Code:
To make the buzzer play different tones, you can use the tone() function provided by the Arduino library.
#define NOTE_B0  31
#define NOTE_C1  33
#define NOTE_CS1 35
#define NOTE_D1  37
#define NOTE_DS1 39
#define NOTE_E1  41
#define NOTE_F1  44
#define NOTE_FS1 46
#define NOTE_G1  49
#define NOTE_GS1 52
#define NOTE_A1  55
#define NOTE_AS1 58
#define NOTE_B1  62
#define NOTE_C2  65
#define NOTE_CS2 69
#define NOTE_D2  73
#define NOTE_DS2 78
#define NOTE_E2  82
#define NOTE_F2  87
#define NOTE_FS2 93
#define NOTE_G2  98
#define NOTE_GS2 104
#define NOTE_A2  110
#define NOTE_AS2 117
#define NOTE_B2  123
#define NOTE_C3  131
#define NOTE_CS3 139
#define NOTE_D3  147
#define NOTE_DS3 156
#define NOTE_E3  165
#define NOTE_F3  175
#define NOTE_FS3 185
#define NOTE_G3  196
#define NOTE_GS3 208
#define NOTE_A3  220
#define NOTE_AS3 233
#define NOTE_B3  247
#define NOTE_C4  262
#define NOTE_CS4 277
#define NOTE_D4  294
#define NOTE_DS4 311
#define NOTE_E4  330
#define NOTE_F4  349
#define NOTE_FS4 370
#define NOTE_G4  392
#define NOTE_GS4 415
#define NOTE_A4  440
#define NOTE_AS4 466
#define NOTE_B4  494
#define NOTE_C5  523
#define NOTE_CS5 554
#define NOTE_D5  587
#define NOTE_DS5 622
#define NOTE_E5  659
#define NOTE_F5  698
#define NOTE_FS5 740
#define NOTE_G5  784
#define NOTE_GS5 831
#define NOTE_A5  880
#define NOTE_AS5 932
#define NOTE_B5  988
#define NOTE_C6  1047
#define NOTE_CS6 1109
#define NOTE_D6  1175
#define NOTE_DS6 1245
#define NOTE_E6  1319
#define NOTE_F6  1397
#define NOTE_FS6 1480
#define NOTE_G6  1568
#define NOTE_GS6 1661
#define NOTE_A6  1760
#define NOTE_AS6 1865
#define NOTE_B6  1976
#define NOTE_C7  2093
#define NOTE_CS7 2217
#define NOTE_D7  2349
#define NOTE_DS7 2489
#define NOTE_E7  2637
#define NOTE_F7  2794
#define NOTE_FS7 2960
#define NOTE_G7  3136
#define NOTE_GS7 3322
#define NOTE_A7  3520
#define NOTE_AS7 3729
#define NOTE_B7  3951
#define NOTE_C8  4186
#define NOTE_CS8 4435
#define NOTE_D8  4699
#define NOTE_DS8 4978
// Define the pin connected to the buzzer
const int buzzerPin = A0;

// Notes of the melody
const int melody[] = {
  NOTE_C4, NOTE_G3, NOTE_A3, NOTE_G3, 0, NOTE_B3, NOTE_C4
};

// Note durations: 4 = quarter note, 8 = eighth note, etc.
const int noteDurations[] = {
  4, 8, 8, 4, 4, 4, 4
};

void setup() {
  // Nothing to set up for this example
}

void loop() {
  // Iterate over the notes of the melody
  for (int thisNote = 0; thisNote < 7; thisNote++) {
    // Calculate the note duration
    int noteDuration = 1000 / noteDurations[thisNote];
    tone(buzzerPin, melody[thisNote], noteDuration);

    // Pause for the note's duration plus 30% to distinguish between notes
    int pauseBetweenNotes = noteDuration * 1.30;
    delay(pauseBetweenNotes);

    // Stop the tone playing:
    noTone(buzzerPin);
  }

  // Add a delay before repeating the melody
  delay(2000);
}
Explanation:
- Tone Function:
tone(buzzerPin, frequency, duration)plays a tone on the buzzer at the specified frequency (in Hz) and for the specified duration (in milliseconds). - Note Durations: Notes are specified in terms of their duration relative to a whole note. For example, a quarter note is represented as 4, an eighth note as 8, etc.
- Melody Array: Contains the notes of the melody you want to play.
- Note Duration Array: Contains the durations for each note in the melody.
Applications
- Alerts and Alarms: Widely used in various electronic devices to provide warning signals and alerts.
- Toys: Integrated into electronic toys to produce sound effects, making them more engaging.
- Timers and Clocks: Used to signal the end of a timed period or to alert users at set times.
- User Interfaces: Employed in appliances, computers, and other electronic systems to provide audio feedback to users.
Key Features
- Ease of Use: Requires only a power connection to operate, without the need for additional circuitry.
- Consistency: Delivers a reliable, uniform tone, ensuring clear and consistent sound output.
- Durability: Constructed with robust piezo elements, ensuring long-lasting performance and reliability.
Practical Tips
- Polarity: Always ensure correct polarity. Reversing the connections may prevent the buzzer from working or potentially damage it.
- Rated Voltage: Use the buzzer within its specified voltage range to avoid damage and ensure optimal performance.
- Mounting: Secure the buzzer properly in your circuit, considering the mechanical vibrations and sound output.
Conclusion
An Active Buzzer with Tone Piezo is a versatile and reliable component used in a wide range of electronic devices for sound generation. Its internal oscillating circuit and piezoelectric technology make it a straightforward and efficient solution for producing consistent and durable audio signals, suitable for alarms, notifications, and user feedback systems. By connecting an Active Buzzer Tone Piezo to an Arduino and using the provided code examples, you can control the buzzer to produce various sounds and melodies. This is useful for creating alarms, notifications, and audio feedback in your projects.
Expertise on Engineering.
Robotic and microcontroller are like toys to me.
I love playing with them.