A push button is a switch that’s activated by pressing it, often with a finger or thumb. When pressed, it either completes or interrupts an electrical circuit, enabling or disabling the flow of electricity. Push buttons find widespread use in a variety of electronic devices and systems for user input, control, and interaction. Here is a simple guide on how to create LED Blinking with Push Button using Arduino.
Fundamental
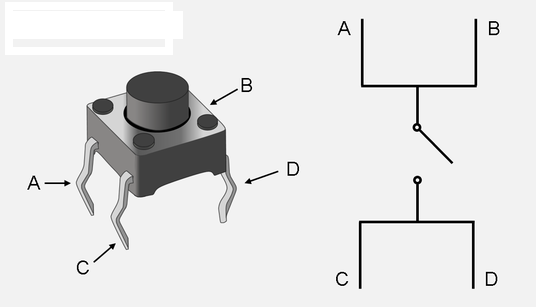
A push button has four legs, it only features two connections (refer to the image below). When the button is pressed, a connection is established between the two pairs of legs (or pins). Usually, when integrating a push button into a circuit, it’s necessary to include a pull-down resistor. This ensures that when the button remains unpressed, a consistent LOW signal (or 0 reading) is maintained.
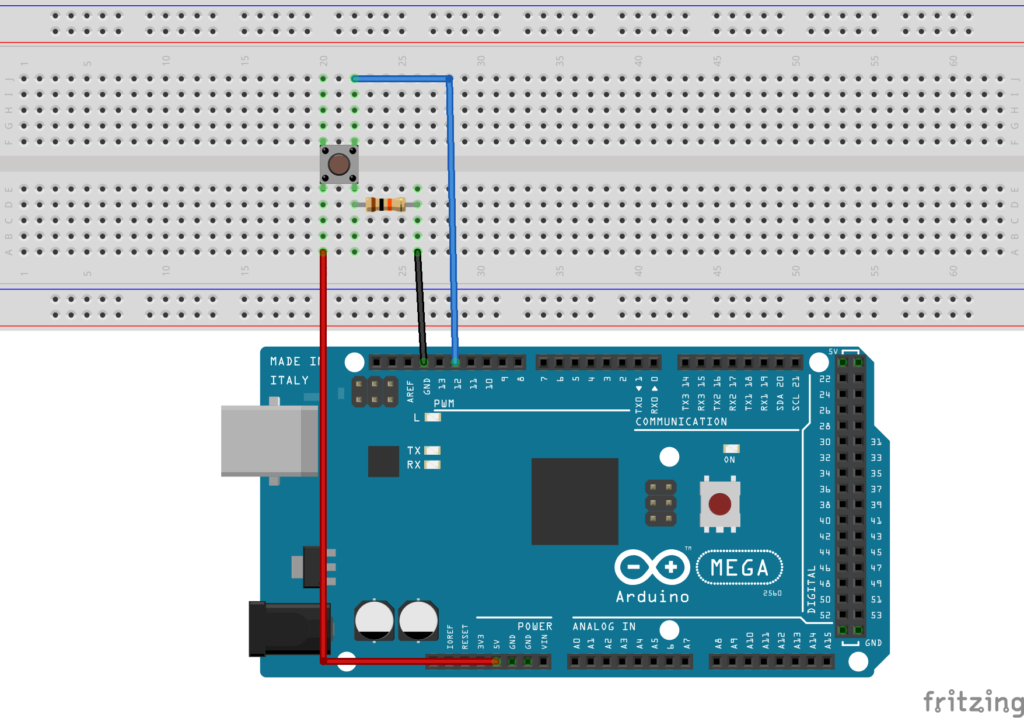
LED Blinking with Push Button Circuit
Basic Push Button Code
In other simple code, paste the following code:
int switchPin = 12;
int ledPin = LED_BUILTIN;
int switchState = LOW;
void setup() {
Serial.begin(9600);
pinMode(ledPin, OUTPUT);
pinMode(switchPin, INPUT);
}
// repeat infinitely
void loop()
{
switchState = digitalRead(switchPin);
Serial.println(switchState);
if (switchState == HIGH) {
digitalWrite(ledPin, HIGH);
}
else
{
digitalWrite(ledPin, LOW);
}
}
This LED Blinking with Push Button using Arduino project is quite elementary, correct? Hence, you could enrich it by incorporating additional components such as a Traffic Light Module and also 7 Segment Display. Therefore, A more intricate and enjoyable project will be devised in future.
Expertise on Engineering.
Robotic and microcontroller are like toys to me.
I love playing with them.