Basic traffic light project by using Arduino Mega R3 is discussed in this article. Generally, traffic light is a signaling device used to manage the flow of traffic, lower the risk of accidents, and enhance pedestrian safety. Basic traffic light circuit with simple Arduino code is presented. Here is a simple guide on how to create basic traffic light project by using Arduino.
Materials Needed
- Arduino Mega 2560 R3 (or any other Arduino board)
- Breadboard
- 3 LEDs; Red, Orange and Green Color with 3 Resistors; 220 Ohm)*
- Jumper wires
- USB cable to connect Arduino to computer
- Arduino Web Editor (online) or Arduino IDE software (offline)
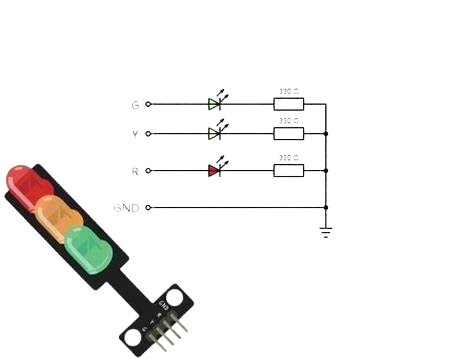
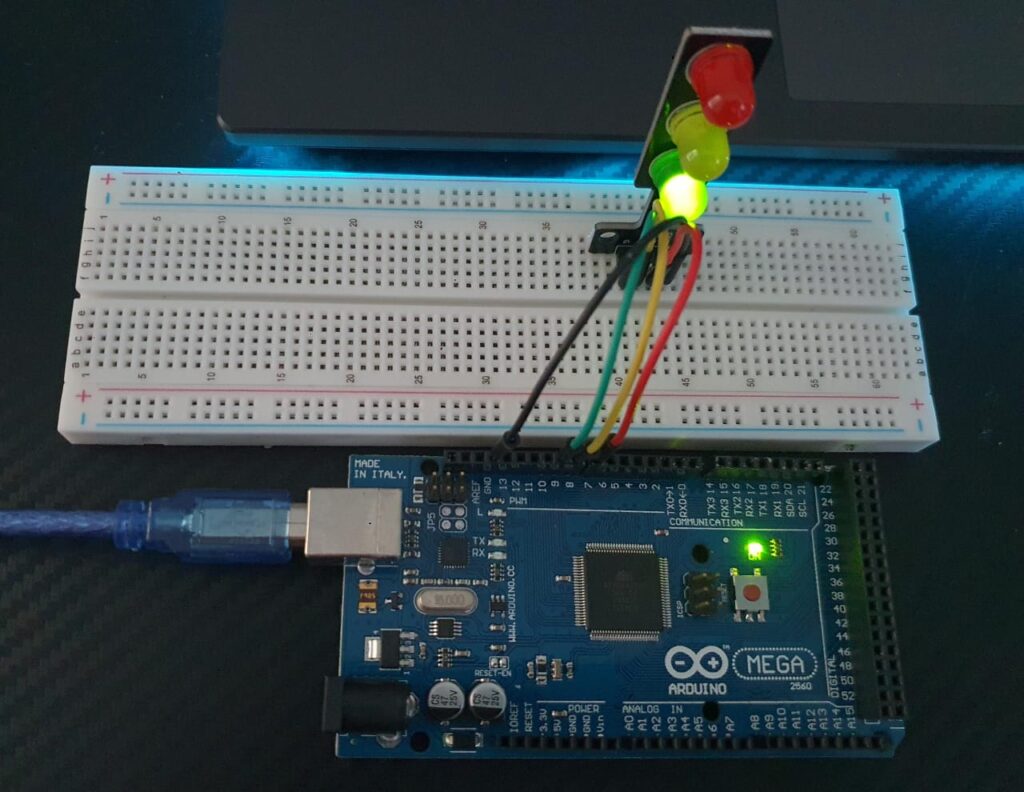
*You can utilize the Ready Traffic Light Module where the resistor is already integrated into the module.
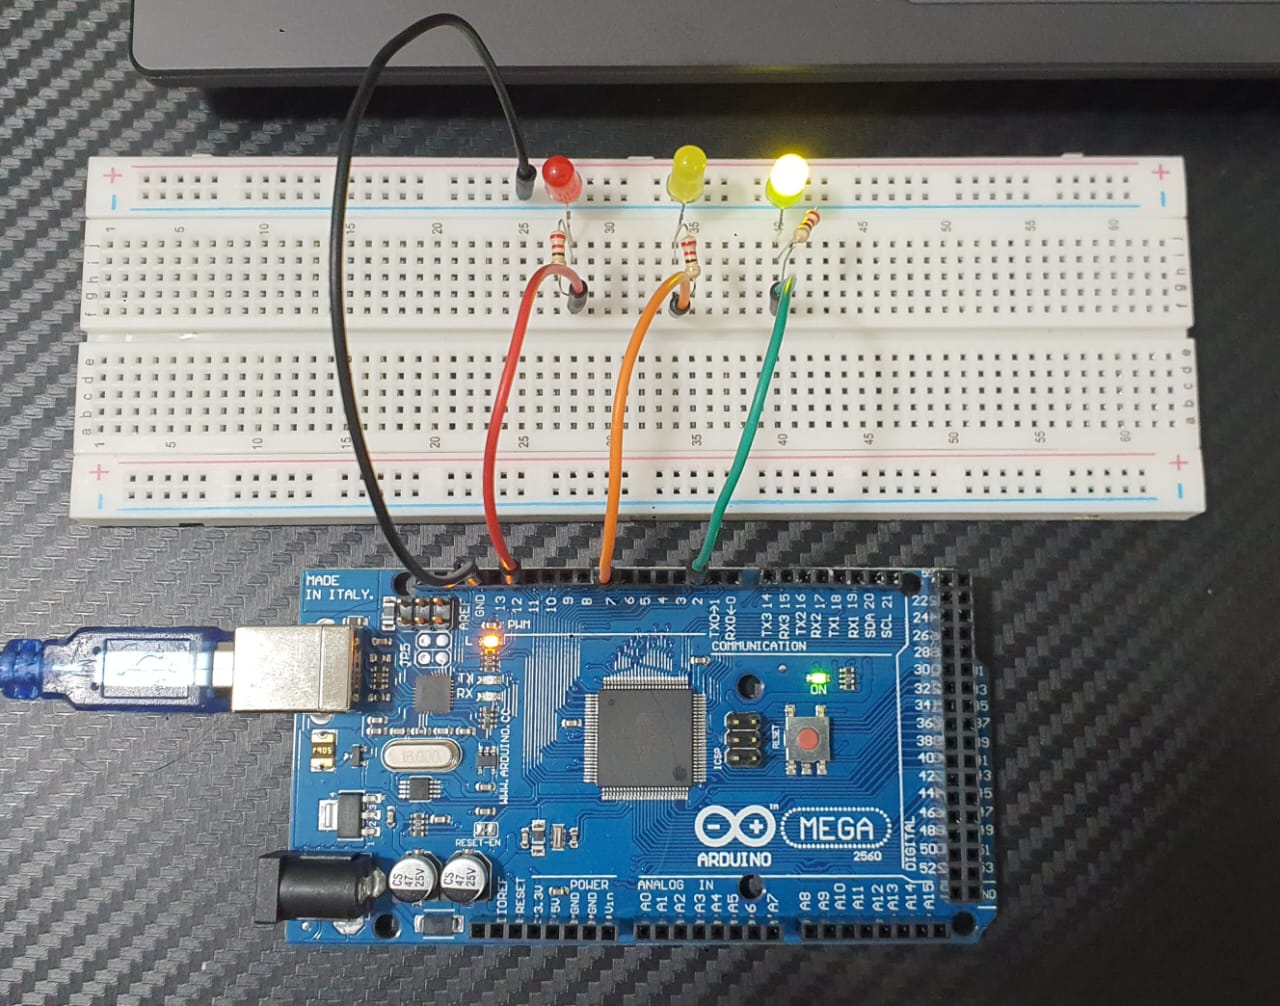
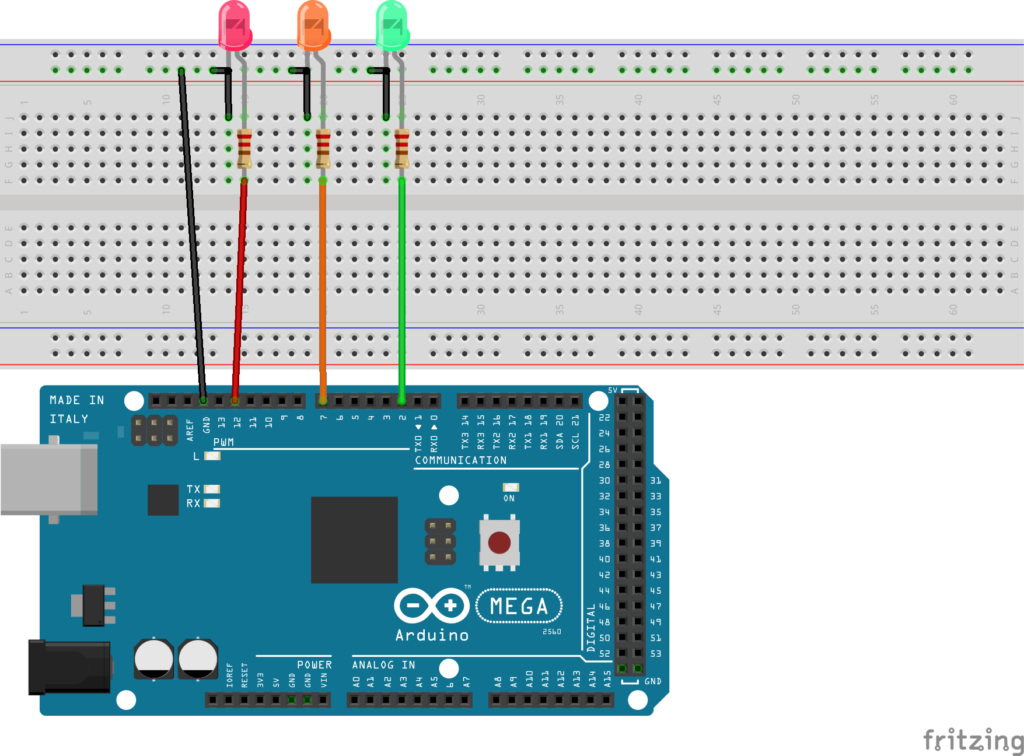
Basic Traffic Light using Arduino Mega R3 Circuit
*Here is the other Basic Traffic Light Breadboard Diagram (Real Picture) employing the Ready Traffic Light Module.
Basic Traffic Light using Arduino Mega R3 Code
In other simple code, paste the following code:
int red = 12;
int yellow = 7;
int green = 2;
void setup()
{
pinMode(red, OUTPUT);
pinMode(yellow, OUTPUT);
pinMode(green, OUTPUT);
}
void loop()
{
digitalWrite(red, HIGH);
delay(15000);
digitalWrite(red, LOW);
digitalWrite(red, HIGH);
delay(1000);
digitalWrite(red, LOW);
delay(500);
digitalWrite(red, HIGH);
delay(1000);
digitalWrite(red, LOW);
delay(500);
digitalWrite(red, HIGH);
delay(1000);
digitalWrite(red, LOW);
delay(500);
digitalWrite(red, HIGH);
delay(1000);
digitalWrite(red, LOW);
delay(500);
digitalWrite(red, HIGH);
delay(1000);
digitalWrite(red, LOW);
delay(500);
digitalWrite(green, HIGH);
delay(15000);
digitalWrite(green, LOW);
digitalWrite(yellow, HIGH);
delay(1000);
digitalWrite(yellow, LOW);
delay(500);
digitalWrite(yellow, HIGH);
delay(1000);
digitalWrite(yellow, LOW);
delay(500);
digitalWrite(yellow, HIGH);
delay(1000);
digitalWrite(yellow, LOW);
delay(500);
digitalWrite(yellow, HIGH);
delay(1000);
digitalWrite(yellow, LOW);
delay(500);
digitalWrite(yellow, HIGH);
delay(1000);
digitalWrite(yellow, LOW);
delay(500);
}
It is very basic project, right? Therefore, you may enhance this project by adding other components such as push button or LED display. You may also study the push button and LED display analogy in here to make bigger project of traffic light.
Expertise on Engineering.
Robotic and microcontroller are like toys to me.
I love playing with them.