The HX1838 IR Receiver module is a commonly used infrared receiver for remote control systems. It detects IR signals transmitted by remote controls and converts them into electrical signals, which can then be processed by a microcontroller. Here’s a detailed look at its features, pin configuration, and a simple guide to get started with it.
Features
- High sensitivity: Capable of detecting low-level infrared signals.
- Low power consumption: Efficient power usage.
- Compact size: Easy to integrate into various projects.
- Demodulation capability: Automatically demodulates the 38kHz modulated IR signal from a remote control.
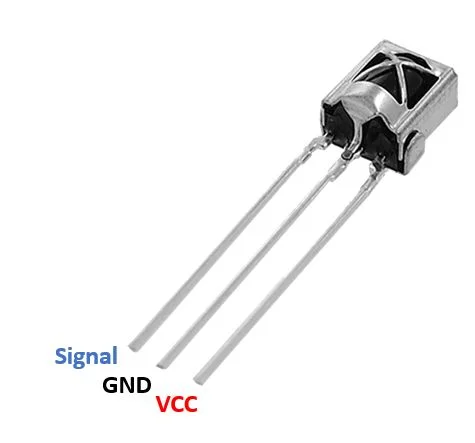
Pin Configuration
The HX1838 module typically has three pins:
- VCC: Power supply pin (typically 3.3V or 5V).
- GND: Ground pin.
- OUT: Signal output pin.
Technical Specifications
- Operating Voltage: 2.7V to 5.5V
- Reception Distance: Up to 18 meters (depending on the remote control and environmental conditions)
- Carrier Frequency: 38kHz
- Reception Angle: ±45 degrees
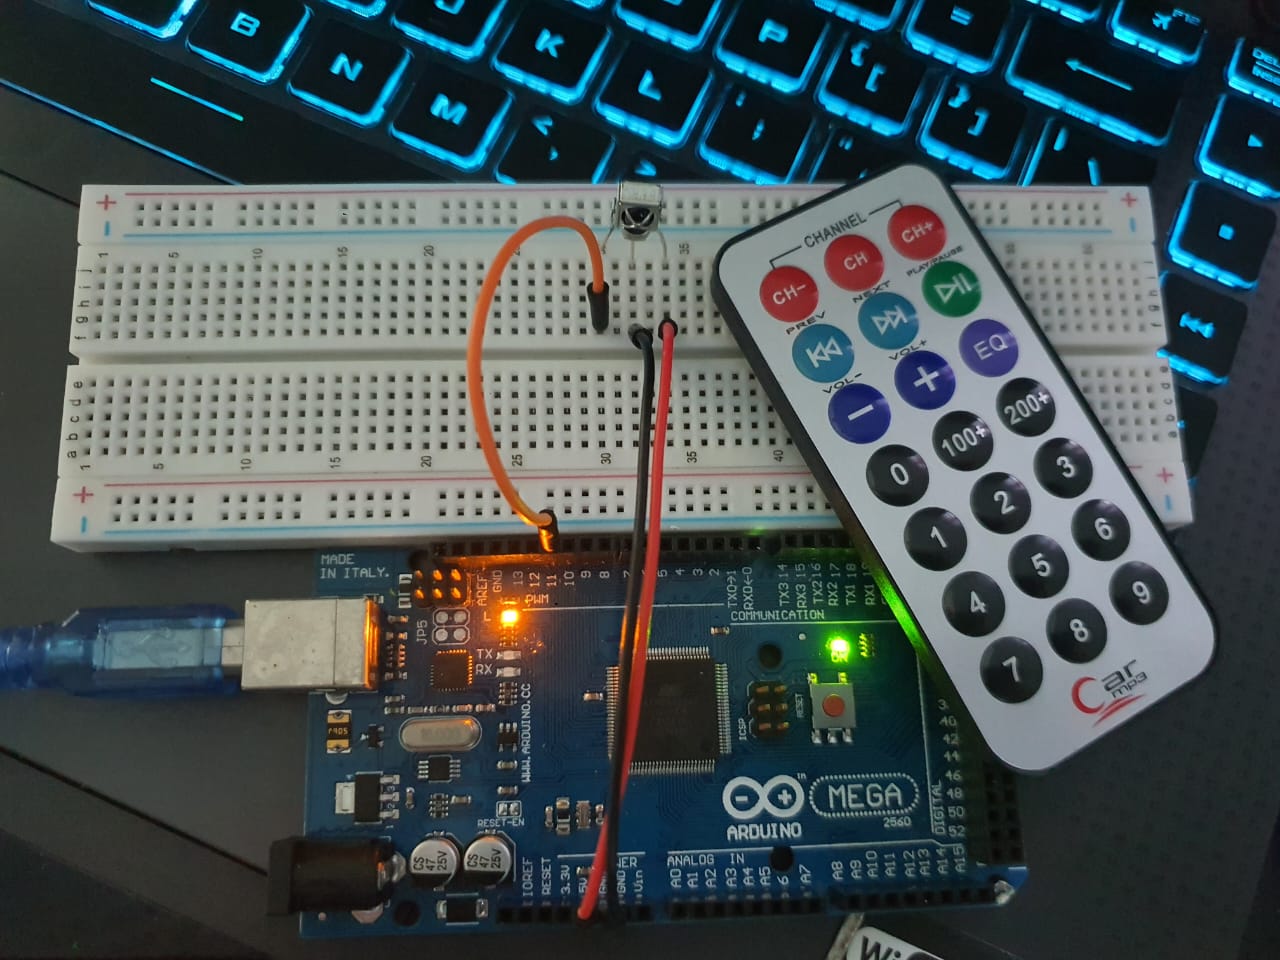
Using the HX1838 with an Arduino
Here’s a step-by-step guide to using the HX1838 IR receiver module with an Arduino to receive signals from an IR remote control.
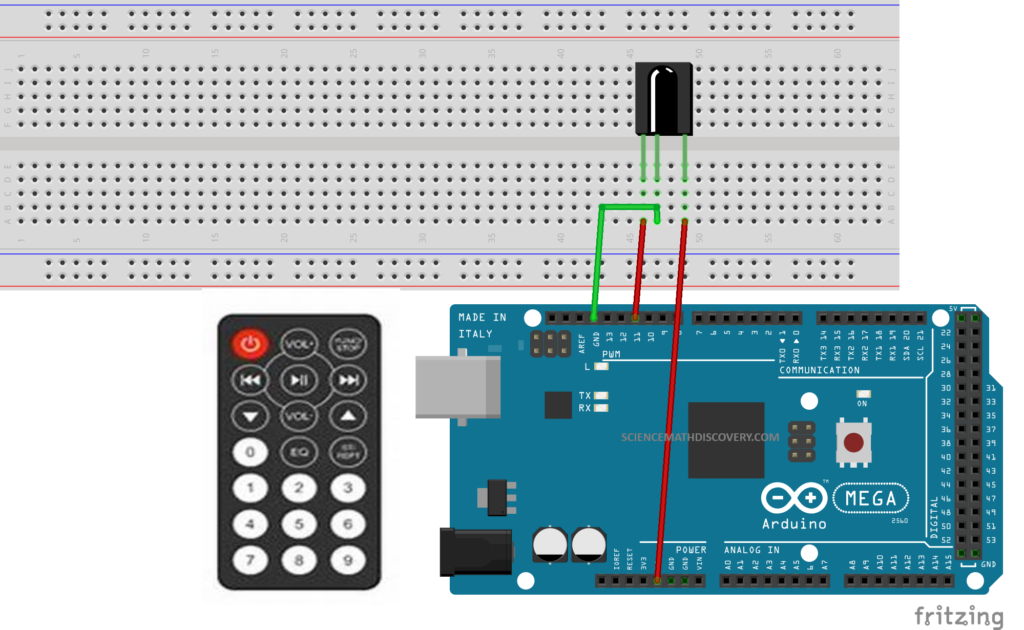
Wiring
- Connect the VCC pin of the HX1838 to the 5V pin on the Arduino.
- Connect the GND pin of the HX1838 to the GND pin on the Arduino.
- Connect the OUT pin of the HX1838 to a digital input pin on the Arduino (e.g., pin 11).
Code
To decode the IR signals, you can use the IRremote library. Follow these steps:
A. Install the IRremote Library:
- Open the Arduino IDE.
- Go to Sketch > Include Library > Manage Libraries.
- Search for
IRremoteand install it.
B. Upload the Code:
#include <IRremote.h>
#include <IRremoteInt.h>

const int RECV_PIN = 11; // Pin to which the output of HX1838 is connected
IRrecv irrecv(RECV_PIN);
decode_results results;

void setup() {
  Serial.begin(9600); // Start the serial communication
  irrecv.enableIRIn(); // Start the IR receiver
}

void loop() {
  if (irrecv.decode(&results)) {
    Serial.print("Received: ");
    Serial.println(results.value, HEX); // Print the received value in hexadecimal
    irrecv.resume(); // Receive the next value
  }
}
Explanation
- Include the IRremote library: This library handles the decoding of the IR signals.
- Set up the IR receiver: Initialize the IR receiver on pin 11.
- Decode and print the signals: In the loop, check if a signal has been received. If so, print the received value to the Serial Monitor in hexadecimal format and then resume receiving.

Troubleshooting Tips
- Ensure proper connections: Double-check the wiring to ensure the module is properly connected to the Arduino.
- Remote control check: Make sure the remote control is functioning and its batteries are not dead.
- Avoid interference: IR signals can be affected by strong light sources, so avoid using the module in direct sunlight or near other sources of IR interference.
Applications
- Home automation: Control devices such as lights, fans, or appliances using a remote control.
- Robotics: Use an IR remote to control a robot’s movements or functions.
- Custom remote controls: Create your own remote-controlled projects, such as a remote-controlled car or a TV remote.
The HX1838 IR receiver module is a versatile component that can be used in various remote control applications. With its simple interface and reliable performance, it is a great choice for hobbyists and professionals alike.
Expertise on Engineering.
Robotic and microcontroller are like toys to me.
I love playing with them.