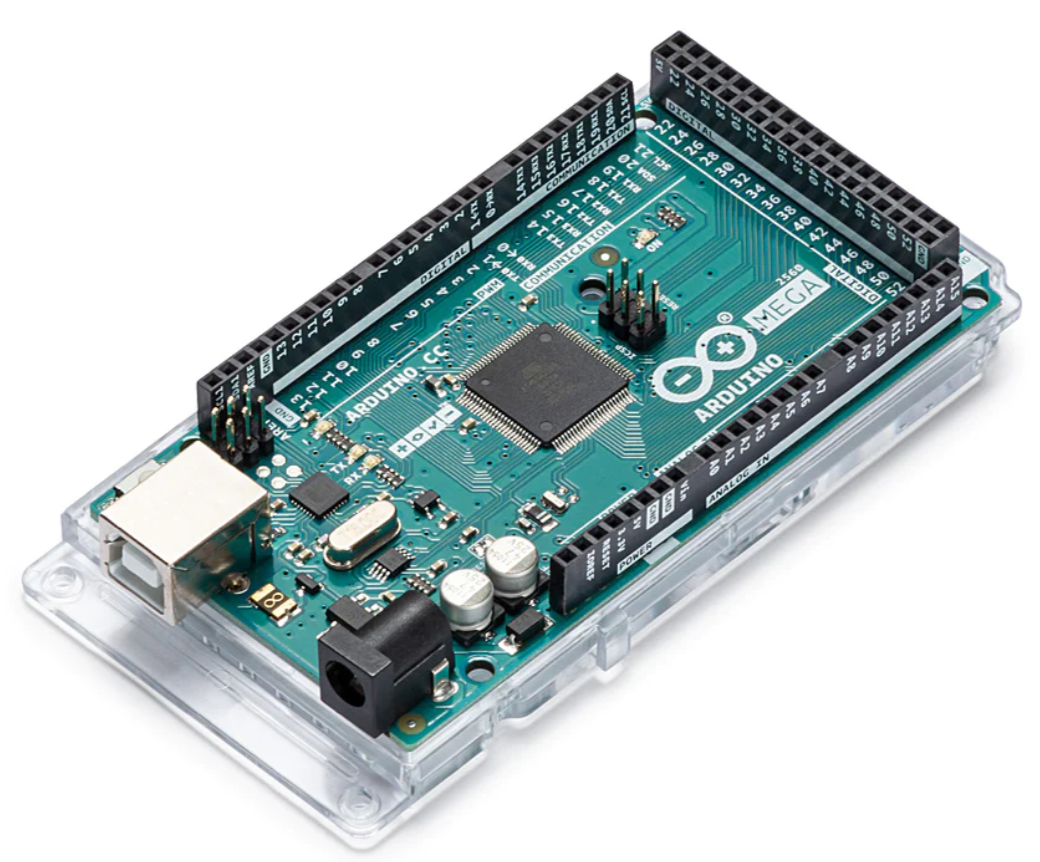
The Arduino Mega 2560 R3 is a microcontroller board based on the ATmega2560. It has 54 digital input/output pins, 16 analog inputs, 4 UARTs, a 16 MHz crystal oscillator, a USB connection, a power jack, an ICSP header, and a reset button. It contains everything needed to support the microcontroller; simply connect it to a computer with a USB cable or power it with an AC-to-DC adapter or battery to get started.
The Mega 2560 board is compatible with most shields designed for the Uno and the former boards Duemilanove or Diecimila. It is an updated version of the Arduino Mega, which it replaces. Here are some key features of the Arduino Mega 2560 R3:
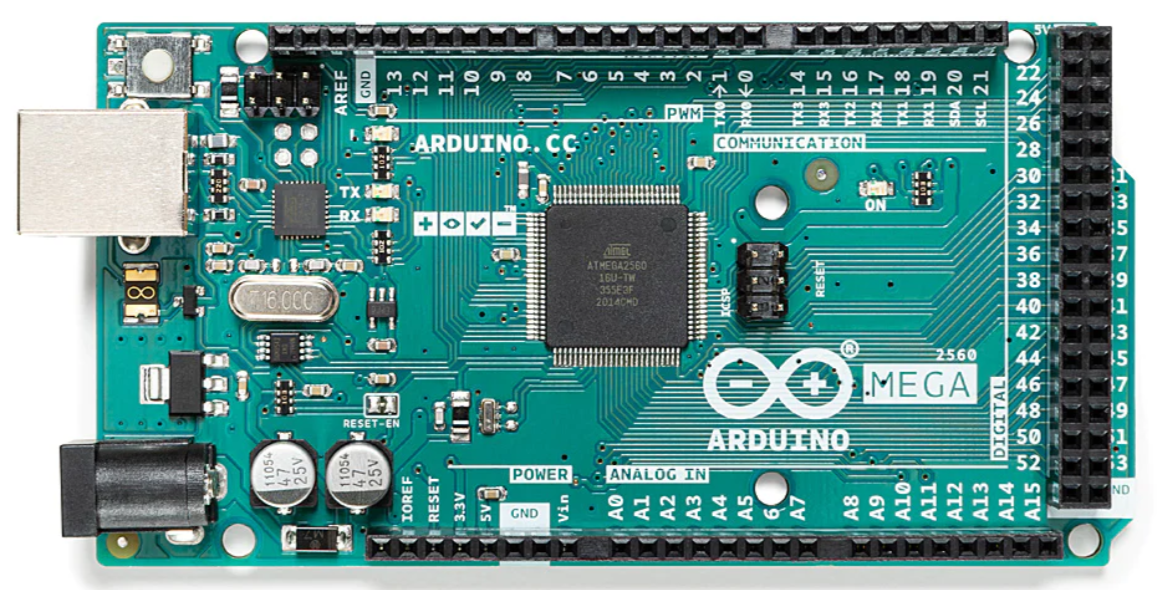
Microcontroller (ATmega2560): This is the brain of the Arduino Mega 2560 R3. It’s a chip where all the computations and logic operations happen. It can be programmed using the Arduino IDE to perform a wide variety of tasks.
Digital I/O Pins (54 in total, 15 can be used as PWM outputs): These are the pins that you can use to interact with the outside world. You can set them as either input or output. When set as input, they can read the state of sensors, buttons, etc. When set as output, they can control LEDs, motors, and other components. Among these, 15 pins can provide a PWM (Pulse Width Modulation) signal. This is a technique to get analog results with digital means, often used for controlling motors or adjusting LED brightness.
Analog Input Pins (16): These pins can read the signal from an analog sensor (like a temperature sensor) and convert it into a digital value that can be used in your program.
UARTs (4 hardware serial ports): UART stands for Universal Asynchronous Receiver/Transmitter. It’s a hardware communication protocol used for serial communication. The Arduino Mega 2560 R3 has four separate UARTs, so it can communicate with multiple serial devices simultaneously.
16 MHz Crystal Oscillator: This is what sets the pace for the microcontroller. It allows the ATmega2560 to perform operations at a rate of 16 million times per second.
USB Connection: This is used for two purposes: to program the Arduino board from your computer, and to power the board. It can also be used for serial communication between your computer and the Arduino.
Power Jack: This is where you can supply power to the Arduino board from an AC-to-DC adapter or battery. The recommended voltage is 7-12V.
ICSP Header: Stands for In-Circuit Serial Programming. This header allows you to program the Arduino with an external programmer.
Reset Button: This button is used to restart your Arduino program from the beginning.
Flash Memory (256 KB), SRAM (8 KB), and EEPROM (4 KB): These are the memory components of the Arduino. The Flash memory is where your program is stored; SRAM is where your program variables are stored when the program is running; EEPROM is a type of memory that retains its content even when the power is turned off, so it’s useful for storing long-term data.
The Arduino Mega 2560 R3 is a versatile board with a lot of I/O pins, making it suitable for projects that require controlling many components. It’s also compatible with most Arduino shields, which are add-on boards that can give your Arduino new capabilities. How to set up an Arduino Mega 2560 R3 will be discussed on the next article. Stay tune.
Expertise on Engineering.
Robotic and microcontroller are like toys to me.
I love playing with them.