Traffic Light with Pedestrian Button is a type of traffic light that include a feature for pedestrians to signal their need to cross. Generally, these signals operate with standard phases of the traffic light, but they may integrate an extra phase dedicated to pedestrians. Activation of the pedestrian phase occurs upon pressing the pedestrian button, enabling safe pedestrian crossing. Traffic light with push button circuit and coding are presented. Here is a simple guide on how to create the traffic light with push button project by using Arduino.
Materials Needed
- Arduino Mega 2560 R3 (or any other Arduino board)
- Breadboard
- Traffic Light Module (3 LEDs;Red, Yellow, Green Color with 3 Resistors;220 ohm)
- Push Button
- Resistor 220 ohm
- Jumper wires
- USB cable to connect Arduino to computer
- Arduino Web Editor (online) or Arduino IDE software (offline)
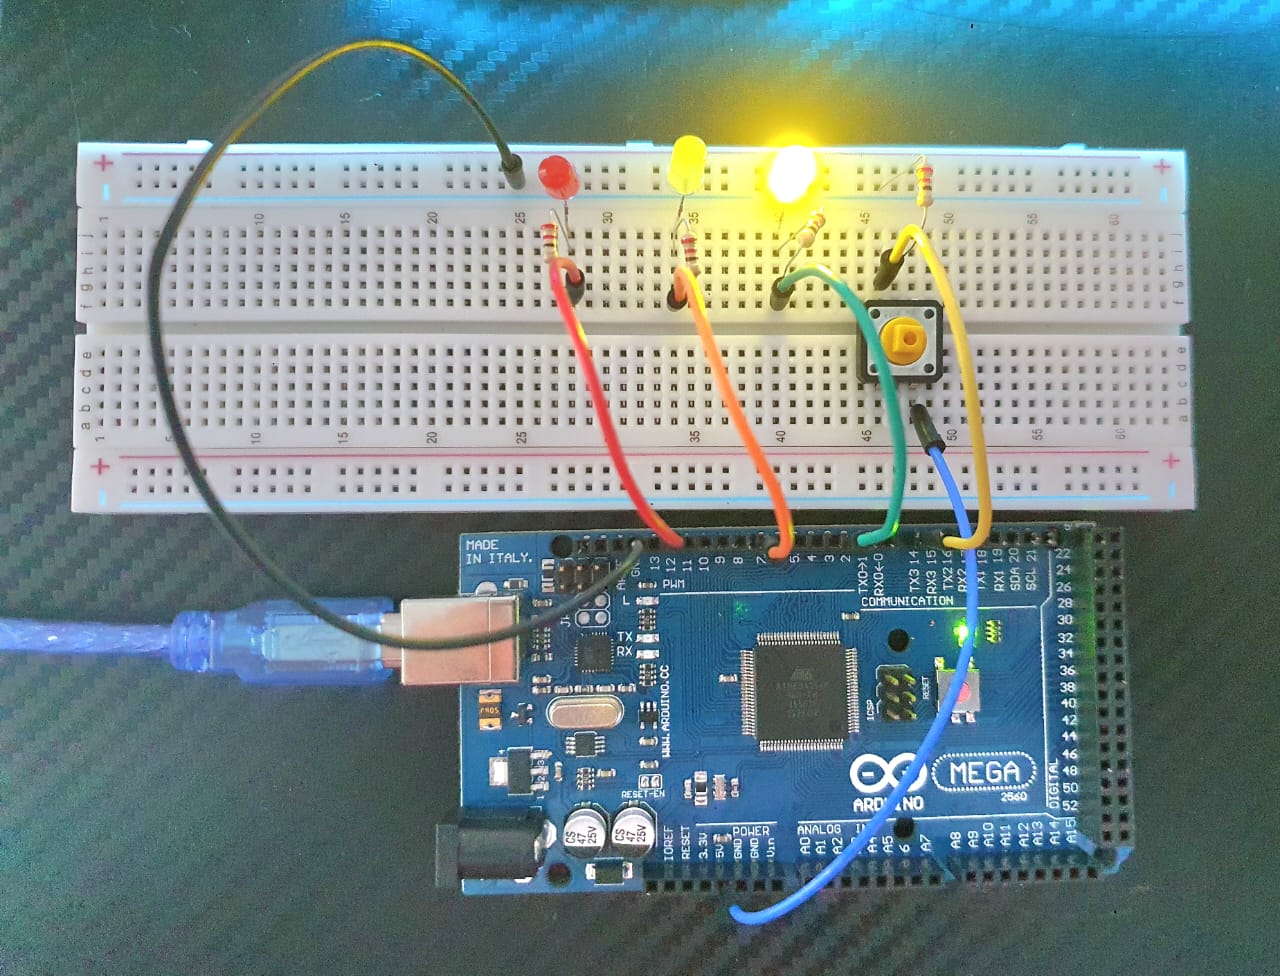
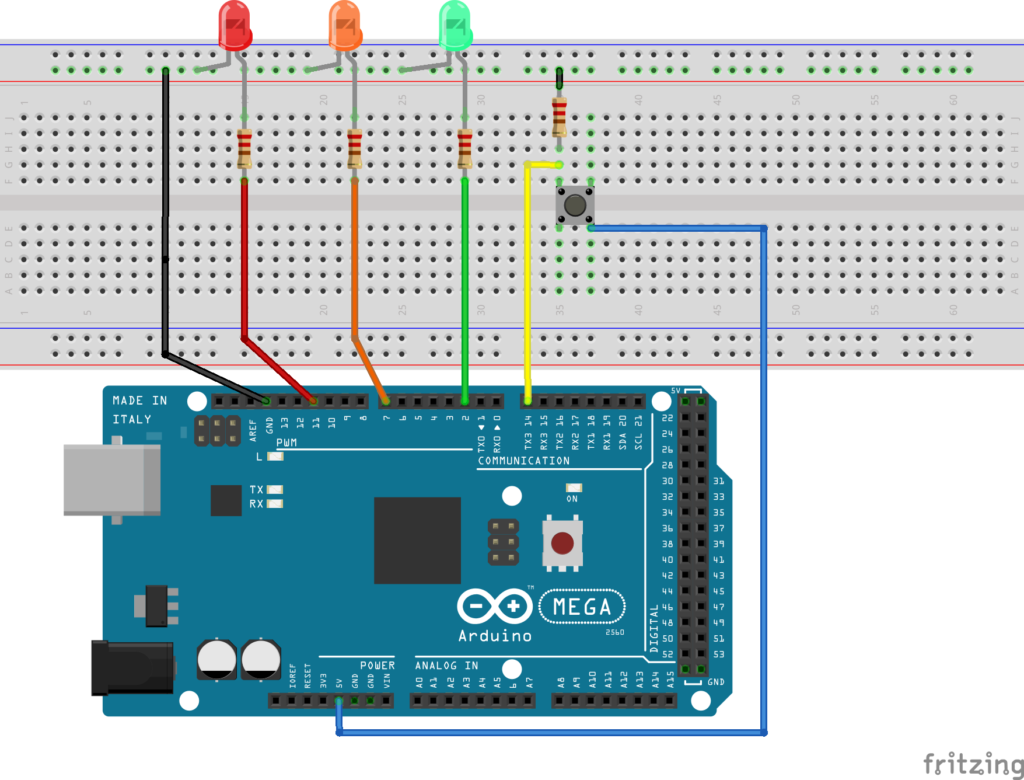
Traffic Light with Pedestrian Push Button Circuit
Traffic Light with Pedestrian Push Button Code
In other simple code, paste the following code:
const int buttonPin = 14; // Pin connected to pushbutton
const int red = 12; // Pin connected to LED
const int green = 2; // Pin connected to LED
const int yellow = 7; // Pin connected to LED
int buttonState = 0; // Give pushbutton a value
void setup()
{
pinMode(red, OUTPUT); // Set LED pin as output
pinMode(green, OUTPUT); // Set LED pin as output
pinMode(yellow, OUTPUT); // Set LED pin as output
pinMode(buttonPin, INPUT); // Set pushbutton pin as input
}
void loop()
{
digitalWrite(green, HIGH);
buttonState = digitalRead(buttonPin); // Read input from pin 2
if(buttonState == HIGH)
{
digitalWrite(green, HIGH);
delay(5000);
digitalWrite(green, LOW);
digitalWrite(yellow, HIGH);
delay(1000);
digitalWrite(yellow, LOW);
delay(500);
digitalWrite(yellow, HIGH);
delay(1000);
digitalWrite(yellow, LOW);
delay(500);
digitalWrite(yellow, HIGH);
delay(1000);
digitalWrite(yellow, LOW);
delay(500);
digitalWrite(yellow, HIGH);
delay(1000);
digitalWrite(yellow, LOW);
delay(500);
digitalWrite(yellow, HIGH);
delay(1000);
digitalWrite(yellow, LOW);
delay(500);
digitalWrite(red, HIGH);
delay(5000);
digitalWrite(red, LOW);
}
}
This project is quite basic, isn’t it? Hence, you could elevate it by incorporating additional components like countdown timer. Exploring the analogy between push buttons and 7 segment displays within this context could expand the scope of the traffic light project into something more substantial.
Expertise on Engineering.
Robotic and microcontroller are like toys to me.
I love playing with them.