The KY-016 RGB Full Color LED Module is a versatile and widely used component in various electronics and DIY projects, especially for creating colorful lighting effects. It integrates a Red-Green-Blue (RGB) LED that can produce a wide range of colors by adjusting the brightness of each primary color (red, green, and blue). Here is an introduction to its features, working, and typical usage.
Features of the KY-016 RGB Module
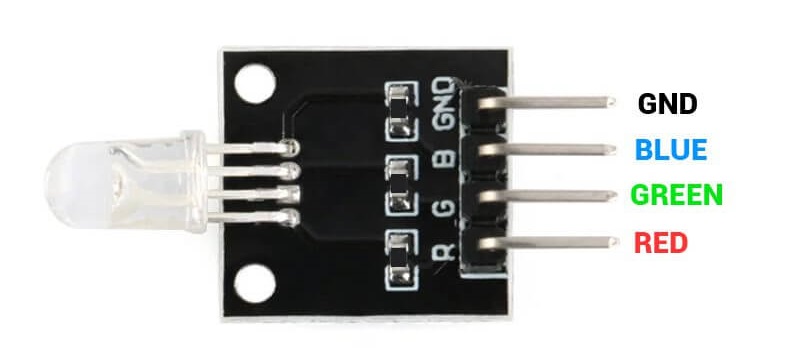
- RGB LED: The module includes a common cathode RGB LED, meaning all three LED colors share a common ground.
- Control Pins: There are four pins:
R (Red): Controls the red LED.
G (Green): Controls the green LED.
B (Blue): Controls the blue LED.
Common Cathode (Ground): Connected to the ground. - Compatibility: It is compatible with various microcontrollers like Arduino, Raspberry Pi, and others.
- Easy Integration: The module can be easily integrated into circuits using jumper wires and breadboards.
How the KY-016 RGB Module Works
The KY-016 module works by controlling the voltage supplied to each of the three LEDs (red, green, and blue). By adjusting the voltage (and thus the brightness) of each LED, a wide spectrum of colors can be produced.
Basic Operation
- Power Supply: Connect the common cathode pin to the ground.
- Control Signals: Apply voltage to the R, G, and B pins to light up the corresponding LEDs. The intensity of each LED can be controlled using Pulse Width Modulation (PWM) signals from a microcontroller.
- Color Mixing: By varying the PWM signals to each of the RGB pins, you can mix the three colors to produce virtually any color.
Example Usage with Arduino
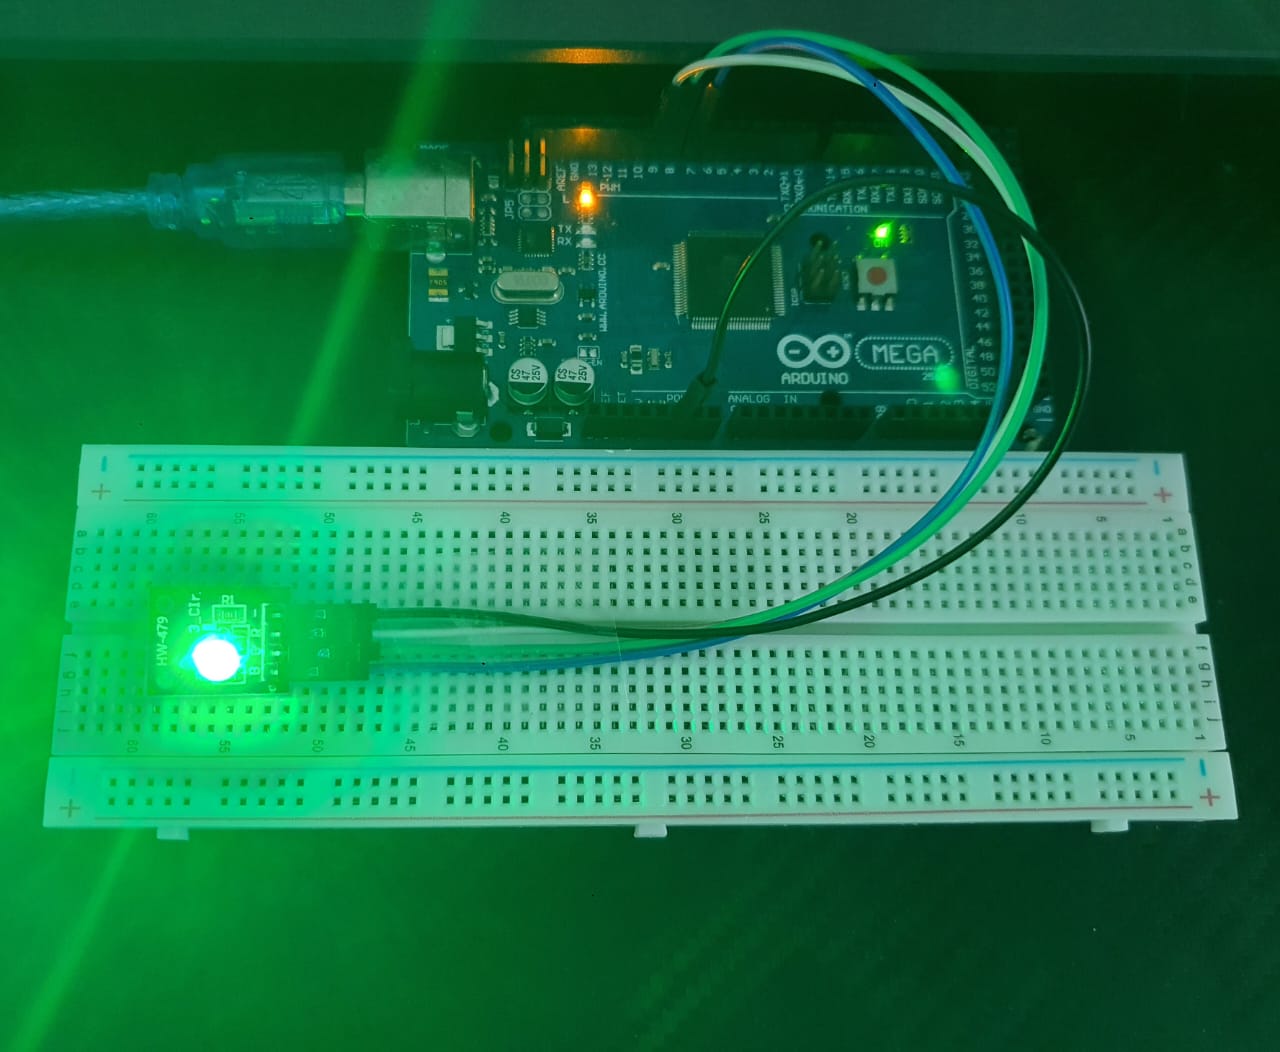
Here’s how to set up and use the KY-016 RGB LED module with an Arduino:
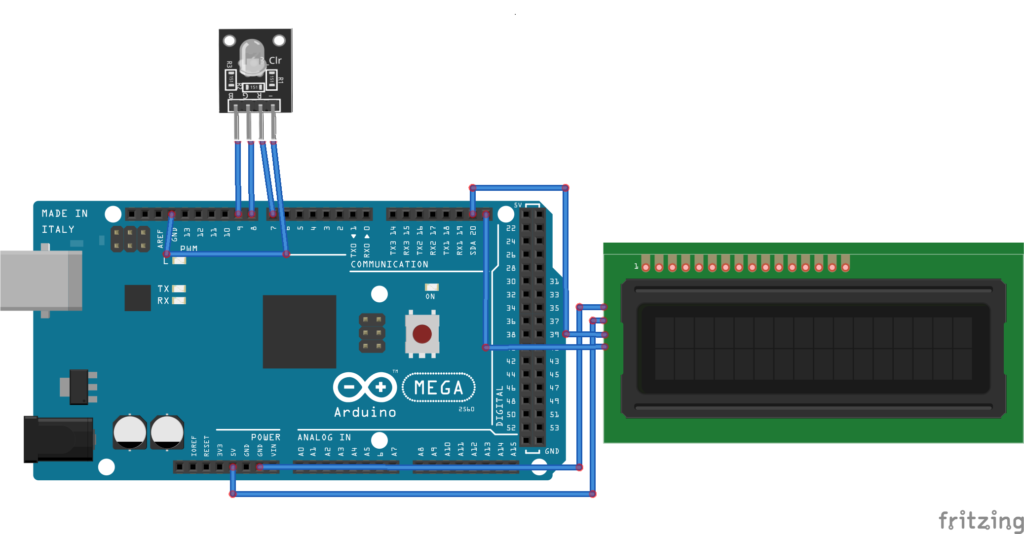
Wiring
- Ground: Connect the common cathode pin of the module to the ground (GND) of the Arduino.
- Red Pin: Connect the R pin to a PWM-capable digital pin (e.g., D9).
- Green Pin: Connect the G pin to another PWM-capable digital pin (e.g.,D8).
- Blue Pin: Connect the B pin to another PWM-capable digital pin (e.g., D7).
Sample Code
int redPin = 9;    // Red LED pin
int greenPin = 8; // Green LED pin
int bluePin = 7;  // Blue LED pin

void setup() {
  pinMode(redPin, OUTPUT);
  pinMode(greenPin, OUTPUT);
  pinMode(bluePin, OUTPUT);
}

void loop() {
  setColor(255, 0, 0); // Red
  delay(1000);
  setColor(0, 255, 0); // Green
  delay(1000);
  setColor(0, 0, 255); // Blue
  delay(1000);
  setColor(255, 255, 0); // Yellow
  delay(1000);
  setColor(80, 0, 80); // Purple
  delay(1000);
  setColor(0, 255, 255); // Cyan
  delay(1000);
  setColor(255, 255, 255); // White
  delay(1000);
  setColor(255, 0, 255); // Magenta
  delay (1000);
}

void setColor(int red, int green, int blue) {
  analogWrite(redPin, red);
  analogWrite(greenPin, green);
  analogWrite(bluePin, blue);
}
Applications
- Decorative Lighting: Create colorful lighting displays.
- Status Indicators: Use different colors to indicate various states in a system.
- Mood Lighting: Change the ambiance of a room with dynamic color changes.
- Educational Projects: Great for learning about PWM, LEDs, and color mixing.
Conclusion
The KY-016 RGB Full Color LED Module is a powerful tool for adding vibrant color effects to your projects. With simple connections and easy control via PWM signals, it opens up a wide range of possibilities for creative and functional lighting solutions. You may get this tool here! In addition, the colors are not limited to these basic examples; you can create a wide variety of colorful lighting effects by adjusting the brightness levels of each color component. For more details on achieving diverse color effects, please refer to the next article tittle Understanding Color Values.
Expertise on Engineering.
Robotic and microcontroller are like toys to me.
I love playing with them.