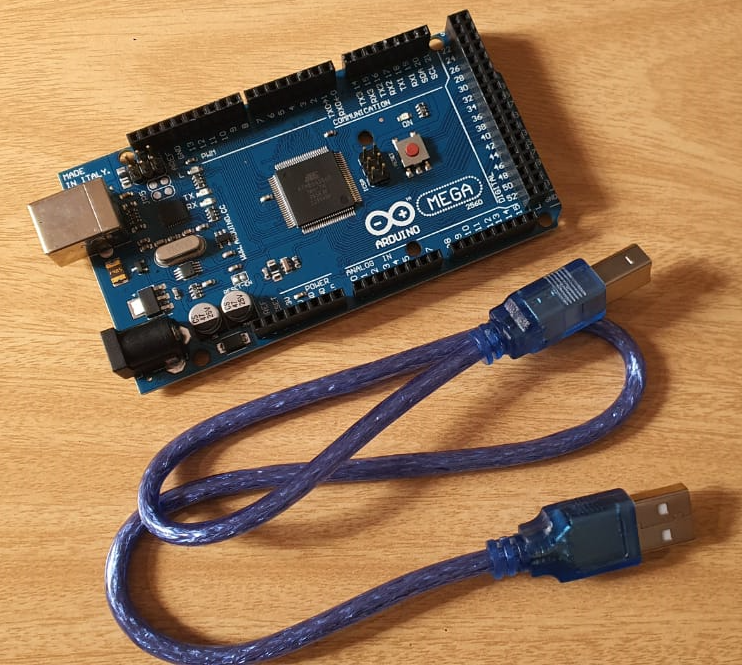
The Arduino Mega 2560 R3 is a microcontroller board based on the ATmega2560. It’s an open-source electronic prototyping platform, which allows users to create interactive electronic objects. Here is a preliminary guide on how to set up the Arduino.
Materials Needed
- Arduino Mega 2560 R3
- USB 2.0 cable type A/B
- Personal computer
- Arduino Web Editor (online) or Arduino IDE software (offline)
To use the Arduino Web Editor simply follow these instructions. Remember that boards work out-of-the-box on the Web Editor, you only need to install Arduino Create Agent to get started.
How to set up Arduino Mega R3
- Connect the Arduino Mega 2560 R3 to Your Computer
Connect the Arduino Mega 2560 R3 to your computer using the USB 2.0 cable type A/B. The type B side plugs into the Arduino, and the type A side plugs into your computer. - Download and Install the Arduino IDE Software
Navigate to the official Arduino website, download the appropriate Arduino IDE software for your operating system (Windows, MacOS, or Linux). Install it following the prompts on the installer. - Install the Arduino Mega 2560 R3 Drivers
When you connect your Arduino Mega 2560 R3 to your computer for the first time, your computer may need to install drivers. This process varies slightly depending on your operating system:- Windows: A pop-up window should appear that will guide you through the installation process.
- MacOS: The drivers should install automatically.
- Linux: You may need to add your user to the “dialout” group to grant the necessary permissions to upload code to the Arduino. You can do this by opening a terminal and typing
sudo adduser $USER dialout, then restarting your computer.
- Launch the Arduino IDE
Open the Arduino IDE software on your computer. - Select Your Board and Port
Click on “Tools” -> “Board: ” -> “Arduino Mega or Mega 2560”. Then, go back to “Tools” -> “Port” and select the port that your Arduino is connected to. On Windows, it’s usually named “COMX” (where X is a number), and on MacOS and Linux, it will look something like “/dev/cu.usbmodemXXXXX”. - Upload a Test Program
Now, to ensure that your Arduino is set up correctly, you should upload a test program. The simplest one to use is the “Blink” sketch, which will blink the onboard LED. Navigate to “File” -> “Examples” -> “01.Basics” -> “Blink”. This will open up a new window with the Blink sketch. Click the “Upload” button (right arrow in the top left corner of the IDE). This will compile and upload the program to your Arduino. If everything is set up correctly, you should see the onboard LED on the Arduino start to blink.
In the next article, we could discuss more about programming the Arduino, connecting sensors and actuators, and implementing various projects.
Expertise on Engineering.
Robotic and microcontroller are like toys to me.
I love playing with them.
