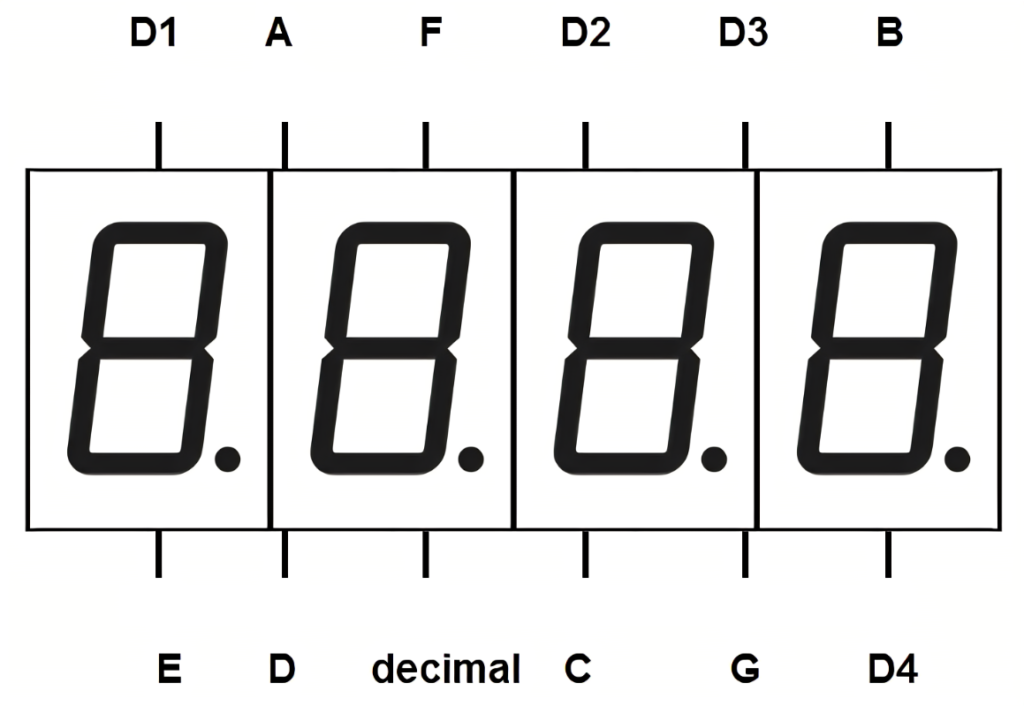
A 4-digit 7-segment LED display is a digital display commonly used to show numerical information. Each digit is composed of seven segments arranged in a specific pattern to represent numbers from 0 to 9. The display can show four digits simultaneously, allowing for the representation of numbers up to 9999. It finds widespread application in digital clocks, electronic meters, and various other devices necessitating numerical output.
Materials Needed
- Arduino Mega 2560 R3 (or any other Arduino board)
- Breadboard
- 4-digit 7-Segment Display (Common Anode or Common Cathode)
- Jumper wires
- USB cable to connect Arduino to computer
- Arduino Web Editor (online) or Arduino IDE software (offline)
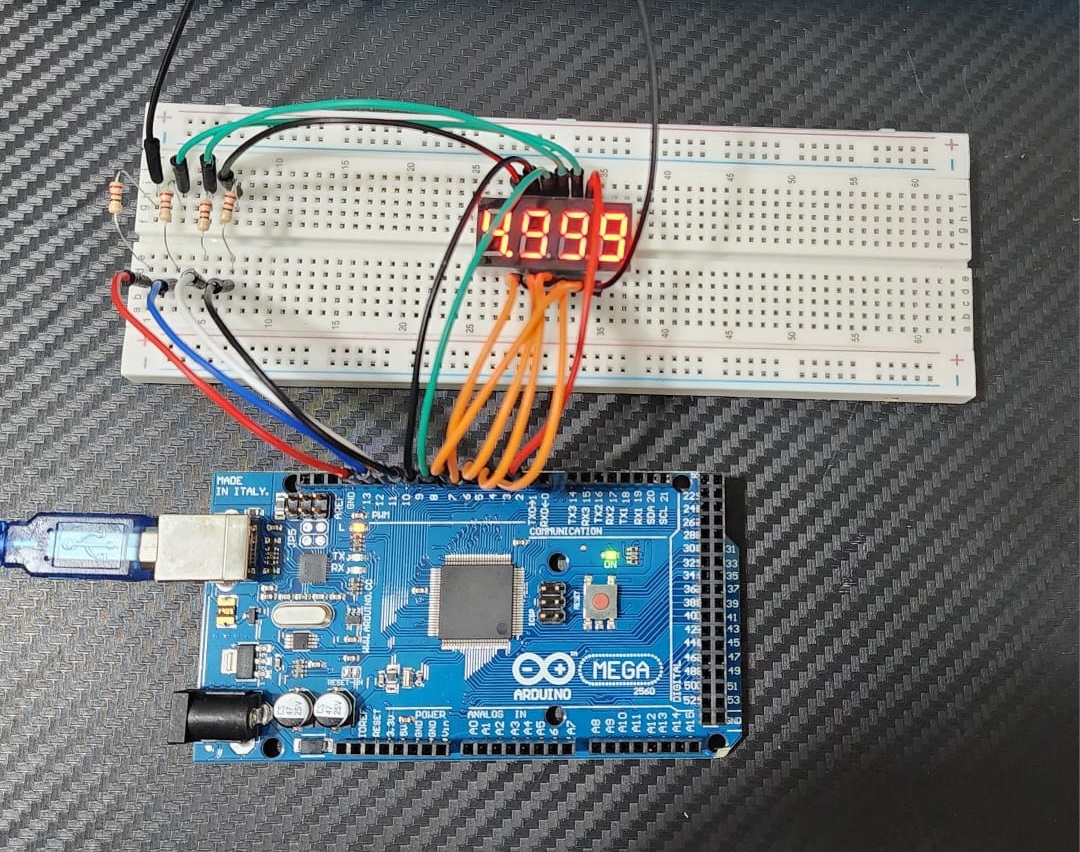
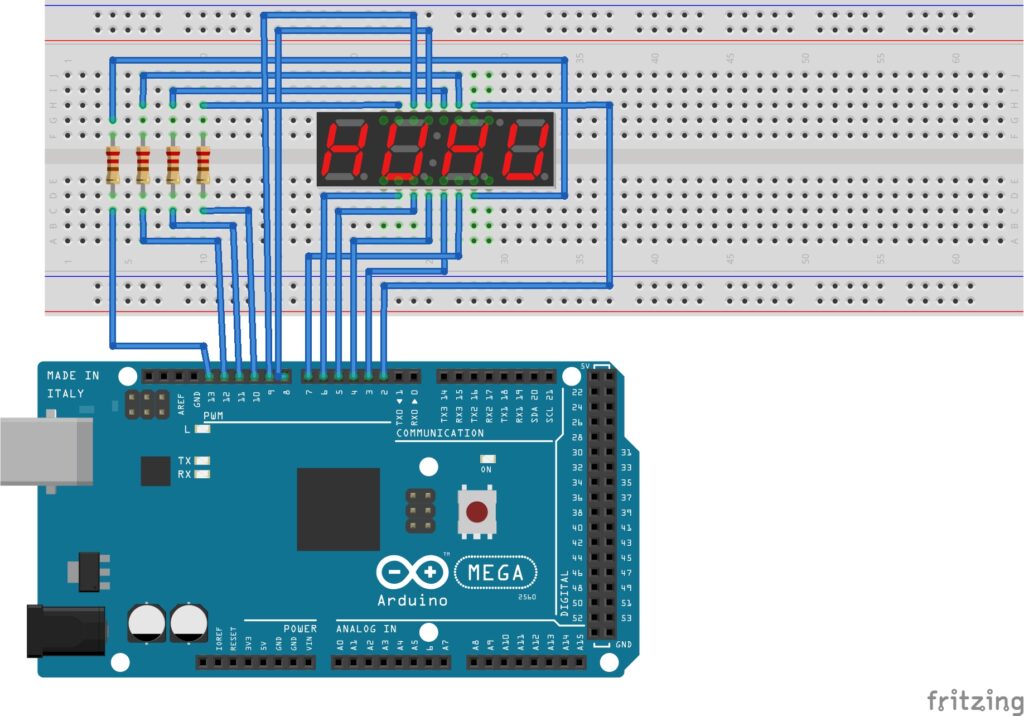
4-Digit 7-Segment LED Display with Arduino Circuit
Wiring Connections: Connect the pins of the 7-segment display to the Arduino as follows:
- Pin A: Arduino pin 9
- Pin B: Arduino pin 2
- Pin C: Arduino pin 3
- Pin D: Arduino pin 5
- Pin E: Arduino pin 6
- Pin F: Arduino pin 8
- Pin G: Arduino pin 7
- Pin Decimal: Arduino pin 4
- D1 (digit 1): Arduino pin 10
- D2 (digit 2): Arduino pin 11
- D3 (digit 3): Arduino pin 12
- D4 (digit 4): Arduino pin 13
4-Digit 7-Segment LED Display Code
#include “SevSeg.h”
SevSeg sevseg;
void setup()
{
byte numDigits = 4;
byte digitPins[] = {10, 11, 12, 13};
byte segmentPins[] = {9, 2, 3, 5, 6, 8, 7, 4};
bool resistorsOnSegments = true;
bool updateWithDelaysIn = true;
byte hardwareConfig = COMMON_ANODE;
sevseg.begin(hardwareConfig, numDigits, digitPins, segmentPins, resistorsOnSegments);
sevseg.setBrightness(90);
}
void loop()
{
sevseg.setNumber(4999, 3);
sevseg.refreshDisplay();
}
In conclusion, the 4-digit 7-segment display Arduino project offers a versatile and engaging platform for learning and experimentation. By interfacing the display with an Arduino microcontroller, enthusiasts can explore the fundamentals of electronics, programming, and digital displays. Through this project, individuals can gain hands-on experience in coding, circuitry, and understanding the intricacies of multiplexing. Furthermore, the project’s applications extend beyond educational purposes, with potential uses in creating digital clocks, timers, temperature displays, and more. Overall, the project provides a rewarding experience that combines creativity, problem-solving, and practical skills development.
Expertise on Engineering.
Robotic and microcontroller are like toys to me.
I love playing with them.